Wednesday, June 29, 2016

Cute Navy & Silver Triangle Bra

OMG, this actually turned out. This was inspired by a Hanky Panky tie-front triangle bralette. I like a front-closure bra. Plus it has a cute tie, which has a hook underneath (which makes more sense than really tying your bra closed).


The pattern is the Brigette Triangle Bra from Ohhh Lulu with some modifications. For one, I used the Ohhh Lulu instructions to add a front closure.


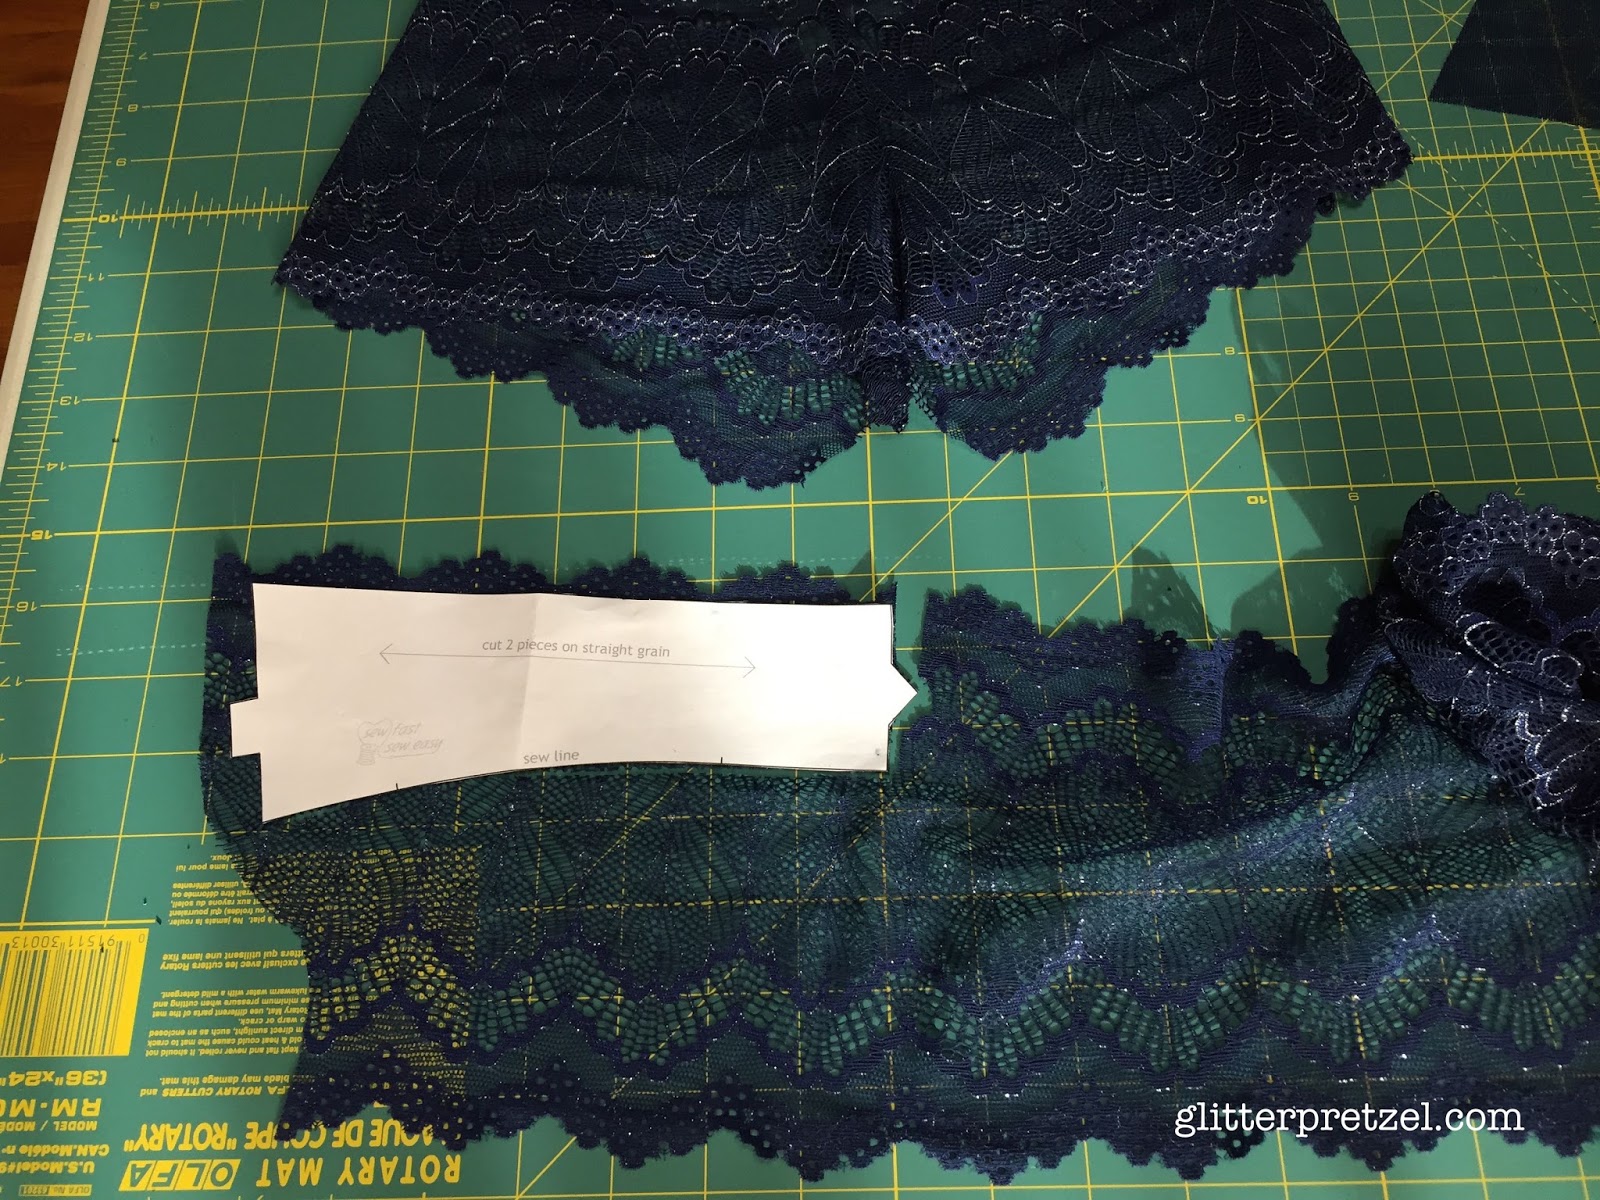
There are only two pattern pieces here, people! You know I will be making more of this style. I joined the seams at the center back where the hook and eye tape would be. I thought this change might make it too tight, but I made the pattern one size up for me, so it all worked out in the end.


I made the body of stretch mesh and added a layer of stretch lace on top. I cut the lace so it ended at the top notch of the cups.


I zig-zagged the lace on all three sides onto the mesh cups that had already been joined. Usually I don't use pins, but you really don't want to be off or asymmetrical in this area (right?).


For the life of me, I cannot get FOE to look nice on a garment, so I used picot elastic instead. Also, left extra elastic at the hem to attach the hook and make a loop.


Another change I made is to have the back strap go all the way to the hem. I've noticed this on mesh bras I've purchased. Seems to keep the light material from stretching out of shape.


Et voilĂ ! Although not quite, as I added the tie detail. I was kind of on the fence about adding it (since it looked nice at this point), but there are only two pattern pieces, so I can certainly make more versions.


The ties are satin craft ribbon attached on the hem elastic.


And here is the back complete. I didn't finish the seams on this, just trimmed them to 1/4" and edgestitched them towards the sides. Seemed like the least visible option for mesh.

I finally used up all my strap elastic, so I will have to purchase some more materials. Maybe orange & white? I am seeing that a lot and loving it.

Sunday, June 26, 2016

Further Adventures in Underpants Land

This afternoon, I made a pair of Rosy Ladyshorts from Cloth Habit. Very easy and exactly what I want to wear every day. The pattern is free (thanks, Cloth Habit!) and there are tutorials (yay, I don't know how to sew knits!).


The trim is stretch elastic from Amazon. The main fabric is a rayon/spandex knit. The color is peacock blue, but for the life of me, I cannot take a picture of the color properly. Imagine it 15% prettier, please.

I took the train to the Boston Common this afternoon and bought the knit fabric at a store in Beacon Hill, Mercer's Fabric. The person working there couldn't be nicer and it's a supercute store.


I'm not from here, but I would have to say it was wicked hot today. The roses in the Public Garden were roasting away and smelled gorgeous. So it was a nice day to sew indoors.


Friday, June 24, 2016

Blue & Silver Lace Tanga

And after making a bra, some matching undies, of course. This is the same soft lace from Tailor Made Shop. The pattern is a quick, easy one from Sew Fast posted on BurdaStyle.


The pattern is a free pdf with an instructional video on youtube, so it was an instant gratification project. There are several nice things about the pattern. I like that it uses the whole width of the lace so you use both decorative edges.

Yes, I have two Swingline staplers I use as pattern weights!
I found it easier to cut each pattern piece as one layer and then flip it to cut the second piece. The lace is slippy, so it helped me cut more precisely. The decorative edges are used to finish the waistband and hem, so it is only a few seams to sew and a zig-zag stitch to apply the lining.


The only thing I changed from the video tutorial was to make the narrowest French seams possible. It wasn't the best idea - it just made tiny, bulky seam (if that is possible). It is not very noticeable, but next time I think I would either serge the seams or just leave the seams raw as the instructions indicate. It's a cute garment. I'd love to try to make something more like a boyshort or tap pant next.

Thursday, June 23, 2016

Navy & Silver Lace Watson Bra


When I told a few friends that I was going to sew a bra, they were amazed! Yes, I had not actually sewn it, but major street cred for intentions. For me, sewing a bra was intimidating since I usually sew wovens. However, as I painstakingly cut out the pattern, I became intimidated by the 14 fabric pieces, plus 10 additional bits and bobs that had to be somehow assembled together.

But now that I've sewn one, I do not want to stop! And let's make underpants too. That would be great! But to take a step back, it would not have been a very successful project were it not for some crowdsourcing (okay, blog surfing) to figure out what I should start out with lingerie-wise. I'd noticed that the Watson Bra pattern by Cloth Habit had quite a few fans. When I saw Lladybird's version, I had to make it. Her work is gorgeous, plus the lace was still available at Tailor Made Shop.
 
So between Cloth Habit, Lladybird and Tailor Made's tutuorials, I was able to put everything together in my mind first. Cloth Habit has wonderful instructions in the pattern booklet as well as online, but I really like Tailor Made's modification to enclose the seams, so I did that.
There was one other raw seam I wanted to enclose, but was not sure how to do. Between the armhole elastic and the hooks, I sewed a bit of picot elastic on top of a raw seam. It's a wee bit bulkier, but the plush on the elastic makes it still comfortable. I'll have to think of something else to do for next time. In the meantime, I am just examining the bras I've gotten from the store. (I would also like to pre-apologize to anyone who might notice me inadvertently examining their bra situation. I was already checking out your garment construction and know this may be going too far.)

Anywho, the bra was finished in a few enjoyable afternoons.

Front.

And back.


The materials are just so comfortable and luxurious. The pattern was also spot on as far as size (what, why?!). There is just one thing that I need to do before putting this into heavy rotation - undoing a little handsewing at the "v" where the cups meet. The edge of the lace was not quite right, so I tacked the lace edge of one cup to the other. This resulted in a bit of asymmetry when I tried it on. Not really what you want in the center front area...

So, thanks for all the help from my fellow sewists! I've got more lace and a lot more inspiration.

Monday, June 20, 2016

Something New

As a dilettante, I'm always looking for something new to learn. I've sewn since I was seven, but I almost always sew wovens. So my next challenge is to sew lingerie. While also doing this and that. And then, who knows what after.

First, I warmed up by sewing a woven muslin for a lovely pajama set (Fifi Pyjamas by Tilly and the Buttons). It's a graceful design. Also, the instruction booklet is gorgeous and detailed.

I think I will wait to sew this in my final fabric once I've had some practice sewing bras. Even with the bust adjustment, I think I could improve upon it for my own figure. Maybe some powermesh lining in the cups? I'm not sure. Woven camisoles don't work for me up top, but it is a lovely design, so I'd like to find a way to make it work.

Also pictured is a bra kit from Tailor Made Shoppe. The materials are beautiful. And intimidating. Soft, stretchy and very puzzling, as I've never made a bra before. I felt so daunted, but then a day later it became a bra! I'll tell you about it next.